THE MULTI ACCOUNT EXTENSION FOR CHATS ON THE GLOBALCOMPANIONS.COM SITE
For your using functionality to search for interlocutors in chats.
ChatOS “Multi-Account” is a unique software that allows you to help in the search for any number of profiles, performing all the necessary actions in one tab. Easy and comfortable.
STARTING WORK WITH THE EXTENSION FOR CHATS
First of all download and install the extension in your browser. How to do it – read here
You can start chat invitations sending only on the chat page.
How to open the chat page
Log in to the site as a lady, then click My account

Click “Сome in Chat”
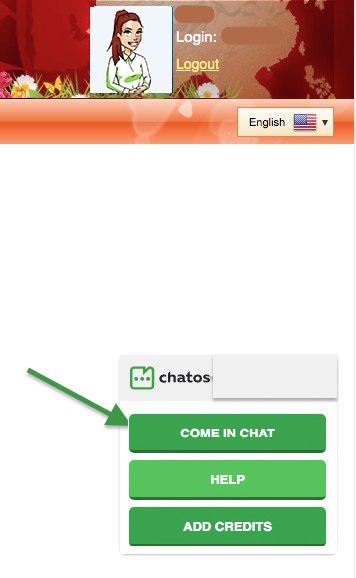
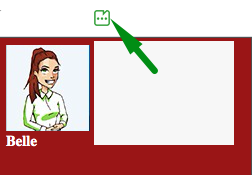
Done! You are on the chat page (the extension icon has become active) Еhe extension is ready to work, launch it
HOW TO ADD THE REQUIRED NUMBER OF PROFILES TO THE CHAT EXTENSION
– open the LADIES section
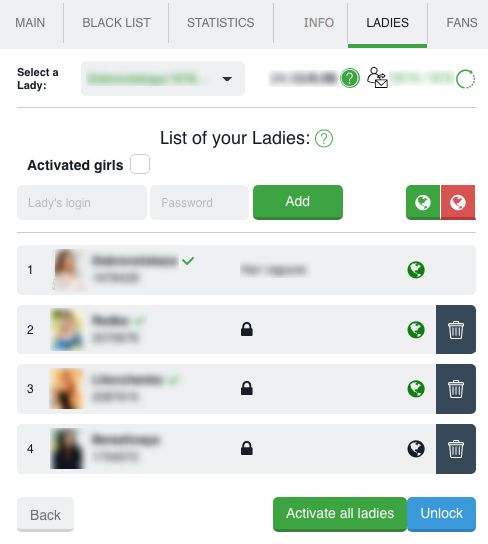
– add the profiles you need to the extension by entering the ID and password of each lady
– When adding ladies, the extension will ask you for a security code. It can be any number combination that you will remember. Code creating is optional. By specifying the security code, the ladies’ passwords will be hidden, and will be shown only after entering the secret code.
– In the LADIES section, you can activate all or selected ladies, switch offline or online status for a specific profile (or all ladies at once)
– After adding all the necessary ladies, proceed to the launch of the sending process.
HOW TO SET UP SENDING PROCESS
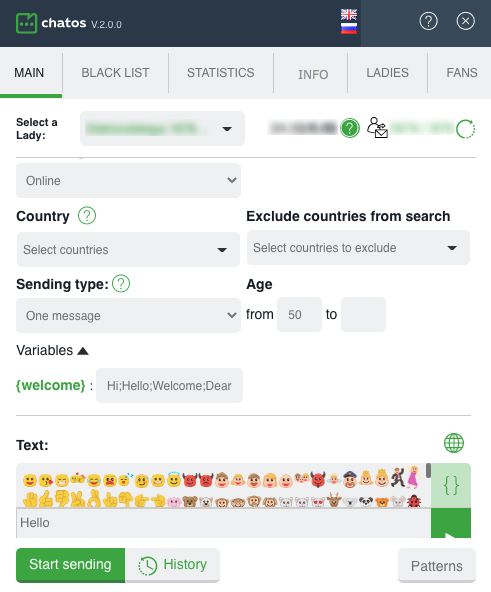
For all profiles, the sending process is configured and launched on the main page of the chat extension.
1.CHOOSE THE LADY YOU WANT
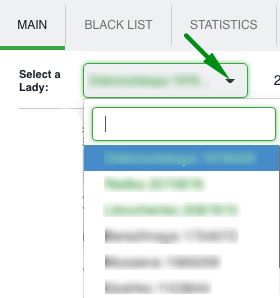
When choosing the lady, her extension launches for her with her information in all sections of the extension.
So, switching ladies, info and men exactly according to the specified profile are in blacklist, fans, statistics, history sections…
2. SPECIFY THE AUDIENCE OF RECIPIENTS IN SEND TO

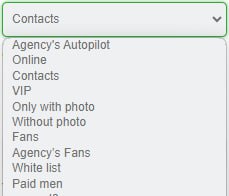
◈⠀⠀Autopilot – An innovative mode for sending invitations to men, which allows you to send different invitations to men randomly from the ChatOS database. This is a one-click sending mode. You do not need to waste time thinking of invitations content or adjusting / changing sending parameters. Just select the Autopilot mode and click on Start sending and the system will randomly send invitations to different categories of men. Info about invitations of Autopilot is here
The autopilot function can be disabled for all ladies in your personal account, if classic sending is your only way of working.
◈⠀⠀Online Invitations will be sent to men who are now online on the site (excluding fans and men from the Blacklist)
◈⠀⠀ Contacts – Invitations will be sent to men from the lady’s list of contacts on the site (excluding fans and men from the blacklist)
◈⠀⠀VIP Invitations will be sent to men who have VIP status on the site (excluding fans and men from the Blacklist)
◈⠀⠀Only with a photo invitations are sent to men, who have a photo in their profiles (except fans and men from the Blacklist)
◈⠀⠀Without photo invitations are sent to men, who have no photos in their profiles (except fans and men from the Blacklist) Chat avatar is not considered as the profile photo.
◈⠀⠀Fans invitations are sent to men from your fan list
◈⠀⠀ Agency’s Fans – sending to other ladies fans (the parameter is available to those ladies in your personal account who set a mark near “Show full info about Fans of the agency’s ladies” in the Fans section settings). Fans of the lady and her black list are excluded from sending.
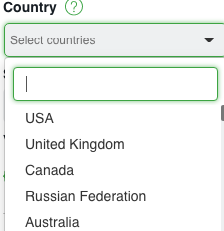
3. SELECT COUNTRY
If you need to specify the geography of your search, select specific countries (one or more) to send or use all countries from the list
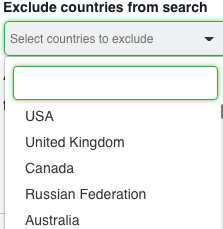
Exclude countries from search – you can specify countries if their representatives are not interesting for you
4. SELECT THE SENDING TYPE

➤⠀⠀One message means that you need to create a new one to send. Text message in the “text” field.
Create an invitation, add emoji, and the preview function will show you how the man will see your invitation on his screen. Try to embed meaning in a limited number of characters.
A globe-shaped icon will translate your language message into the English version if there are difficulties with English.
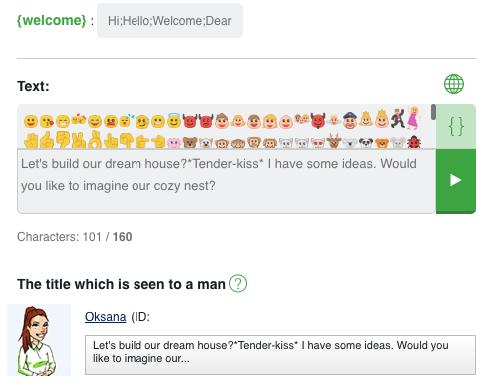
The function of checking the message for links and emails will not allow sending such an invitation and will inform you about the necessity to change the text.
You have the ability to add a greeting variable {welcome} to the message to a man (for which you can create values yourself by separating them with a semicolon)
And clicking on the {} icon. You can add variables {name}, {age}, {city}, {country} with one click in the message text.

➤⠀⠀All messages means that all messages from your previous history will be sent randomly.
➤⠀⠀Selected Selected messages will be sent from your history. Choose some messages and they will be sent randomly.
➤⠀⠀With answers Messages from your history which got responses from men will be send.In the
5. AGE
Optionally specify the desired age of male recipients

6. ADDITIONAL MESSAGES
If necessary, configure additional messages and configure settings for working with fans.
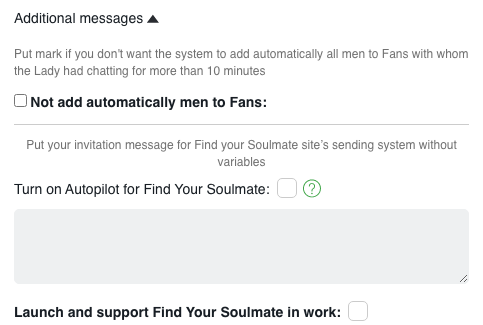
– By default, the system automatically adds men to the Fans list if the chat lasts more than 10 minutes. If you have another approach to work, check the box next to “Not add automatically men to Fans” and fill your lists of regular interlocutors manually.
– By creating a message and checking the box next to “Launch and support FYS in work”, the Find Your Soulmate will be kept active all the time when you do not have chats
– By checking the box next to “Turn on the Autopilot for Find Your Soulmate” and the box next to “Launch and support FYS in work”, you will not need change and to come up with invitations to send. Different invitations from the ChatOS database will be sent to men. Details are here
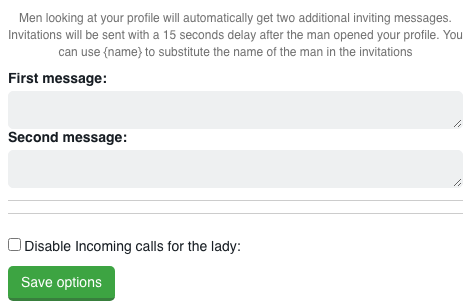
– Having created two more additional invitations to the chat, the man will see them with an interval of 15 seconds after he starts viewing your profile.
– If you do not want to receive incoming calls from men while online on profiles that have such a function, check the box next to “Disable Incoming calls for the lady” and save the settings for her. This setting will persist until you cancel it in the settings.
Important! After setting (editing) each setting for the profile, you have to save the changes.
Switching profiles to “Select a lady”, you can set the settings for each of your profiles.
7. MINI CHAT SETTINGS
Mini Chat – the ability to conduct chats in one tab.
скрин 4
About the possibilities of Mini Chat and the Settings block for Mini Chat – see the details here
8. CLICK START SENDING
9. NEXT LADY
Now you can set up sending from the next lady by repeating the procedure from step 1 (choosing a lady)
процедуру с п.1 — выбора девушки
HOW TO WORK WITH CHAT EXTENSION SECTIONS
“Black list”
By choosing a lady, her extension and her Blacklist are opened for you.
Аdd men, you do not want to communicate with. Specify the man’s ID, his Name and brief information about him.
Select the option “Personal” (the man will be in your personal blacklist)
Save the changes – and it’s done!
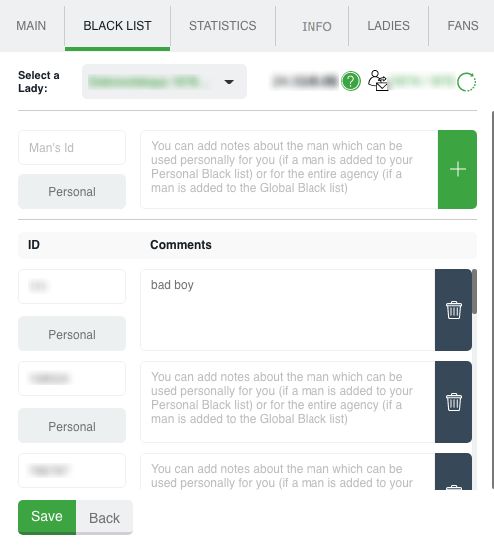
Global blacklist – list of unwanted men for communication for the girls of your entire agency inside your personal account How to add men to the Global Blacklist – here
You can add / remove a man from the Personal Blacklist with one click directly on the chat page. Just click on the blacklist icon – and a particular man is listed. Quick delete from the list works similarly. Blacklist is common for Lady in extensions for chats and mails.
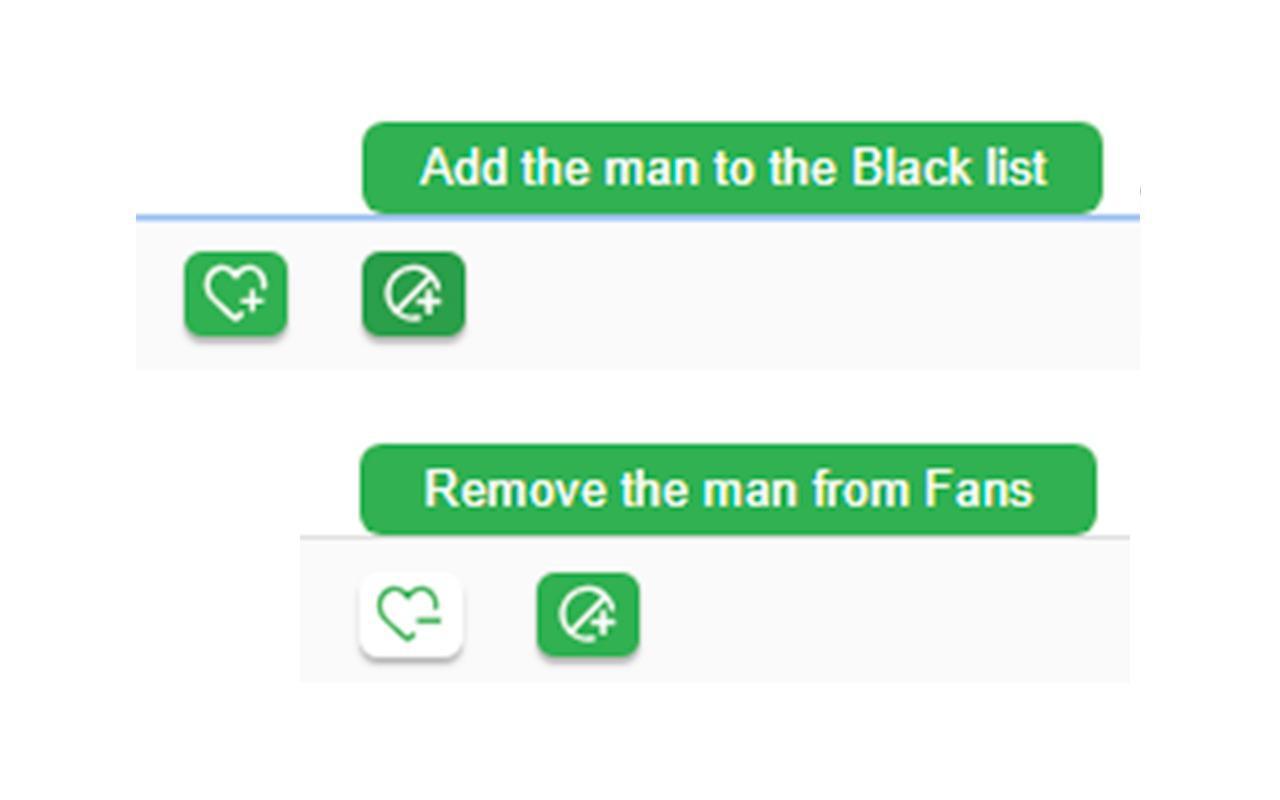
Men from the Blacklist will never receive a chat invitation. Please note the Blacklist will not interact with “Find your soulmate” sending service from Svadba.com.
“Statistics”
By choosing a lady, her extension and her Statistics are opened for you.
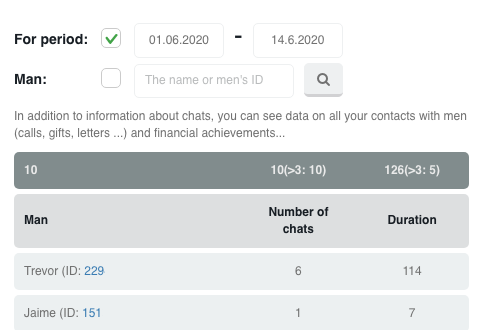
This is the place where information about your chats is stored. How many chats you had, when, with whom they were, how long it was. And search filters will easily help you quickly find the information you need.
“Info”
By choosing a lady, her extension and her Info are opened for you.
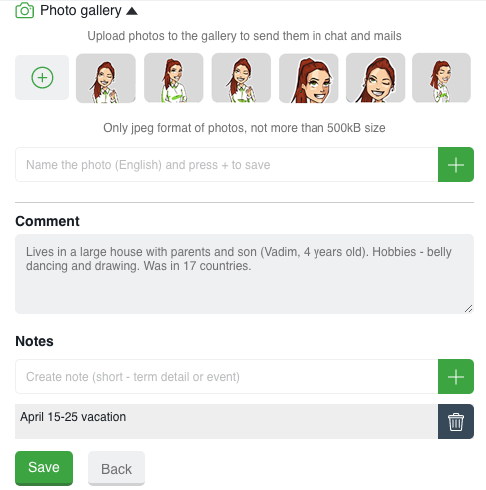
Full information about the lady’s profile. This section is a common for extension for chats and mails. When you add information to one of the extensions, it integrates into both. Here is the lady’s photo gallery for sending photos in letters and chats, comments about the profile and small notes which are important to remember. Upload any number of photos, add everything you need to know about the profile. This information will always be available to you.
You no longer need a lot of different folders or docks on the computer for different ladies.
“Ladies”
There is a list of your profiles in the Ladies section.

Using the “Add profile” button, entering username and password, you can create your profiles list. After successful entry, a lady will appear in the list with an avatar and name as she is presented on the site.
If you need to delete a profile, use the “Trash” icon and confirm your desire to remove the profile from the list.
You will quickly find the required lady by starting to enter the data for the required profile in the appropriate field.
With one click, you can activate the extension for all the ladies in the list using the “Activate All” button
You can set the online or offline status for a specific lady or all profiles by clicking on the globe. Green globe – online profile, red – offline profile, gray – the profile has not launched the extension today yet.
Set code / Unlock. These functions are used to hide passwords of profiles. When adding profiles, the system will prompt you to set a security code (set it or not – optional). The code can be any five-digit number that you will remember and enter if you need to open and view the passwords of the ladies.
“Fans”
By choosing a lady, her extension and her Fans are opened for her.
This is a list of your most prospective and precious interlocutors.
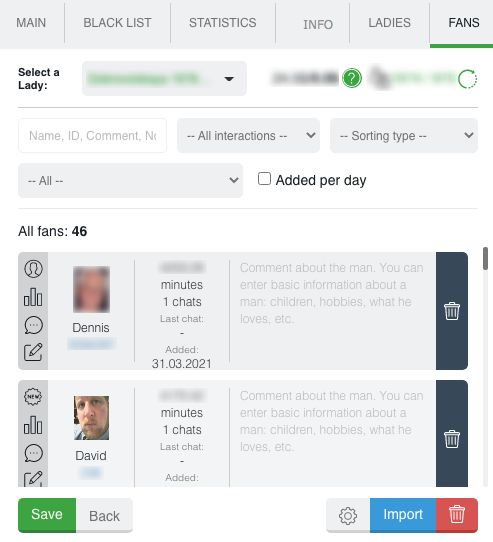
To add a man to the fans just click on the man’s avatar in the chat window, confirm the action. And another way is to click on the “heart” icon in a chat with a fan.

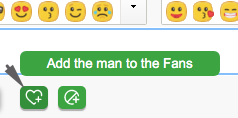
After adding a man to your fans, you can assign a fan status, add comments and notes about him, quickly find the information you need and sort fans using search filters.
In the chat window with a fan there is all the necessary information about him to your attention. There are comments, notes, fan status icons, quick viewing of profile information, a reminder of a fan or an event about the man.


More details how to use the functionality of fans – here
You can also add a list of men to your fans. Use the Import function, enter the ID of men separated by commas and import

“History”
By choosing a lady, her extension and her History are opened for her.
History is an archive of your sent invitations to a chat.

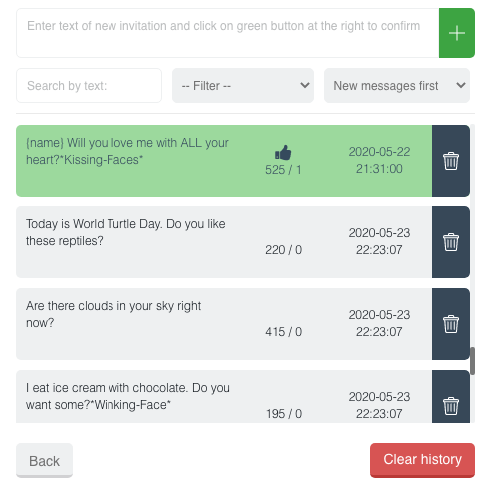
Here you can see the text, the number of sent messages, the number of replies, the date when the last message was sent. And color saturation will inform you about the feedback. The richer green color, the more rated the message is.
To “History” you can add messages manually. Enter text and save. If there are several messages, add them via Enter. So you can quickly update the database of invitations (especially it’s effective when you send several different messages)
When clicking on a message in History List it will be transferred to the text field on the extension main page. So you can easily point out the necessary invitations and start sending.
If you need to start “from the very beginning” and you don’t need anymore the history of sent messages and information about them, just click on the button “Clear History” and confirm your action.
It is very easy to find the necessary invitations or analyze the invitations for “efficiency” using sorting and searching by text
“Patterns”
By choosing a lady, her extension and her Patterns are opened for you.
Patterns – section is previously saved phrases in the extension. These are universal phrases that you most often use when communicating with men. Patterns button is on the main page of the extension

Add as many phrases as needed
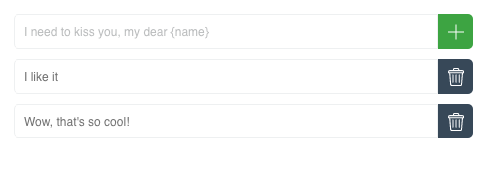
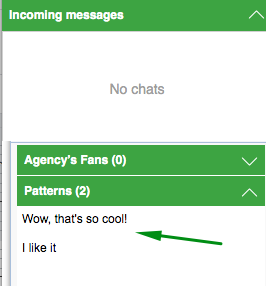
after that in the chat window with a specific man select the desired phrase from the Patterns section and quickly send it to the chat. More details on how to use – here
UNIQUE FEATURES
➫⠀⠀Mini Chat is a unique tool that allows you to have any number of chats for any number of profiles in one tab. How to use minichat – info here
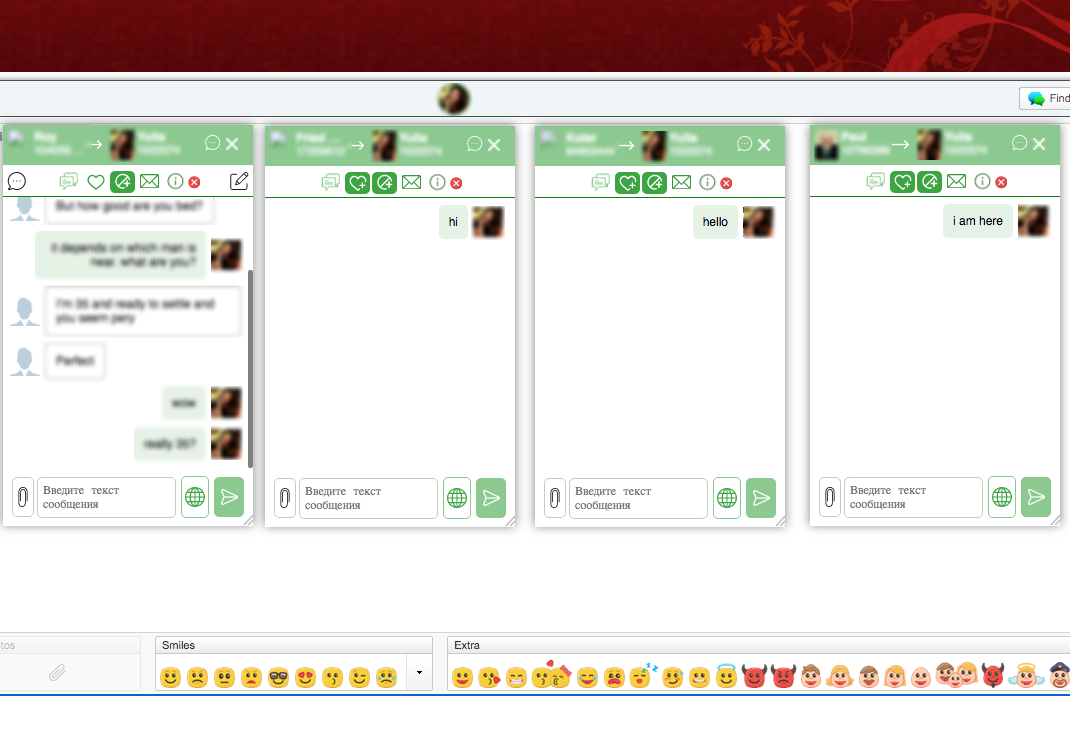
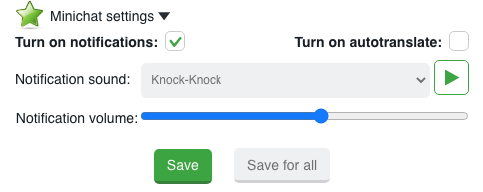
➫⠀⠀Chat start notification – as soon as a man sent the first message in the chat, you will hear a sound notification, receive a browser notification (by clicking on which you can open a chat)
The audio message will repeat 3 times with an interval of 20 seconds if the chat is still not open.
The extension has a smart notification system. It monitors all incoming messages and user actions with an active extension for chats, and notifies about the current ones. You will not miss anything.
➫⠀⠀Chat Auto-opening – by checking the corresponding box, a new chat will open automatically as soon as the man sends the first message.
A new chat will open in the mini chat window (if the mini chat is activated) or in a new browser tab (if you do not use the mini chat) after the sound notification “New message”

➫⠀⠀Sending status – by launching sending process, you will watch its progress for each lady

➫⠀⠀Sending Auto-restart – in case of page reload, unplanned interruption of the sending process, short break (up to 2 hours), the previous sending session will be restored automatically as soon as you launch the extension again.
➫⠀⠀Opening the chat page for a lady you need – to open the chat page for the lady, just click in the sending status block on the chat icon of the corresponding lady.

➫⠀⠀Comments and Notes about a fan – in the chat with a fan, a field with notes and comments is available to you. Write down everything you have learned about the man, and you will remember and quickly find all the necessary information about him.

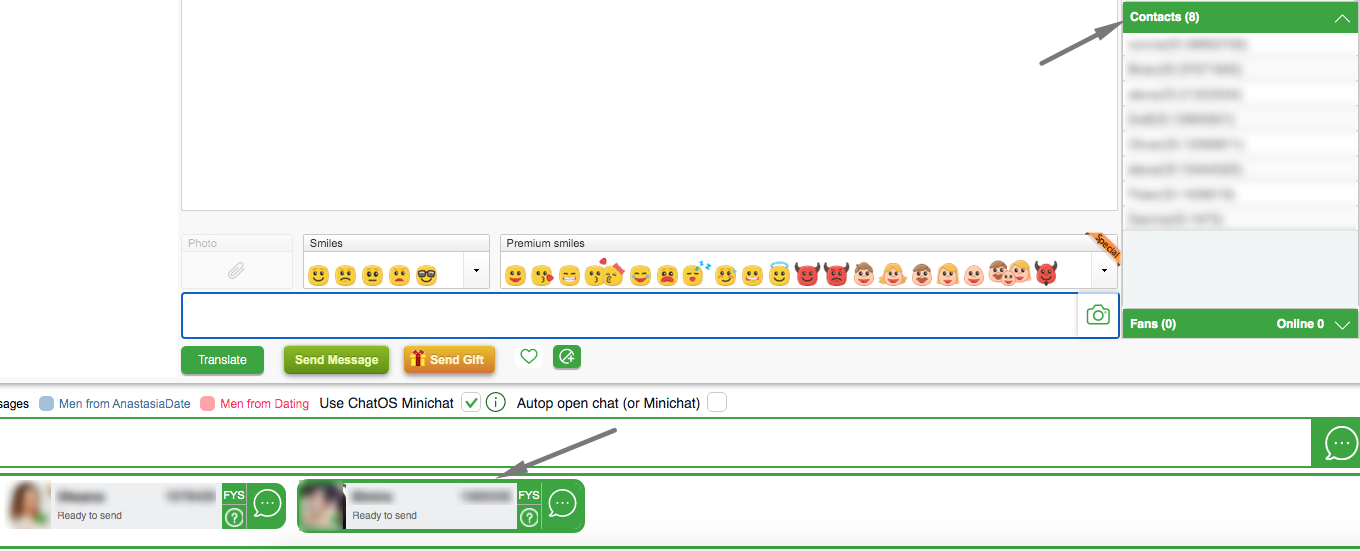
➫⠀Ladies’ Fans and Contacts – being on the page of the main lady (entered the site), you can view the statuses of the online / offline fans of any lady.
Just select a lady by clicking (she will be highlighted with a green border) and you will see sections with her fans and contacts . By switching ladies, the fans and contacts of each of them will be displayed. With the help of the minichat, you can send messages to them
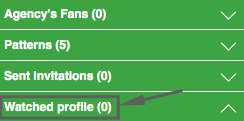
➫⠀Men viewing the profile – the “Watched profile” section is the information about all men who are interested in all your profiles. Men remain on the list for 10 minutes from the moment they start viewing the profile. Click on a line with the needed man minichat will be opened with him, you can message.
➫ Find Your Soulmate – being on one tab, you can also launch the Svadba’s sending tool FindYourSoulmate for all profiles.
In the extension on the main page for each lady, set the texts for “Find Your Soulmate”, check the boxes next to “Launch and support Find Your Soulmate in work” and save the settings.
After that, sending process will be automatically kept enabled, until you cancel it by unchecking the checkbox in the extension
Red “FYS” – “Find Your Soulmate” is not working right now
Green “FYS” – “Find Your Soulmate” is sending your invitations.

Autopilot – sending in one click. Autopilot allows you to send different invitations to men in random order from your agency’s database. You don’t need to waste time coming up with invitations or setting up/changing sending options. Just select the Autopilot mode, click Start sending, and the system will randomly send invitations to different categories of men.
Blocking incoming calls – Incoming calls can be disabled for the required profiles, on the main page of the extension for a specific lady in the Additional messages section

Quick Start / Stop sending by one profile – in the sending progress block you can start or stop sending for profile without opening the extension

Quick Start / Stop sending for all profiles + Finish of work – you can finish work in 1 click on all profiles or start sending for all in a special block located to the right of the sending progress

➫⠀⠀Free translator – enter the text of the message in your native language, click on the globe icon in the extension or Translate in the chat and the text in English is ready to be sent.
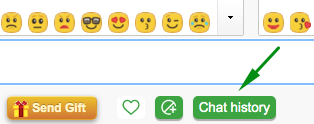
➫⠀⠀Chat history In the chat window click on the man with whom you had chats before. You will see the button “Show the chat history the man”. Click on it and you can see contents of the chats with a man with the date and time of sending each message for last 3 month period.
➫⠀⠀Sending in different tabs – you can send messages from all profiles in one tab, or you can open a separate tab for each lady. When you open a tab for a lady, the sending data will automatically be pulled into a new tab. Once the tab is closed, the sending process will “return” to the main page.
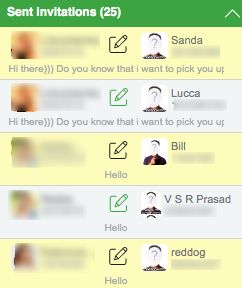
➫⠀⠀Sent control – you can track all sent invitations in the “Sent invitations” section. There is the text of the sent invitation, data about the male recipient and the female sender, the counter of sent invitations to the chat.
➫⠀⠀Chat duration timer – in the block of incoming messages there is a chat duration counter for you. There is the time from the first incoming male message to the moment with the notification that one of the interlocutors left the chat.

➫⠀⠀Hotkeys – if you prefer the keyboard to the mouse, there is a set of hotkeys for you
“Alt + T” (Windows OS) “Opt + T” (MacOS) – automatic translation of the message text to send into English (your native language – English)
“Alt + A” (Windows OS) “Opt + A” (MacOS) – switch between open Mini Chat windows down the list
“Alt + S” (Windows OS) “Opt + S” (MacOS) – switch between open Mini Chat windows forward in the list
“Alt + D” (Windows OS) “Opt + D” (MacOS) – go to the next unanswered Mini Chat window
“Alt + W” (Windows OS) “Opt + W” (MacOS) – open a new Mini Chat window when receiving notifications about a new chat
“Alt + Q” (Windows OS) “Opt + Q” (MacOS) – close the currently active Mini Chat. Active means the one which is focused now (indicated by the bright green background of the window)
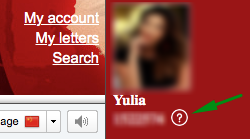
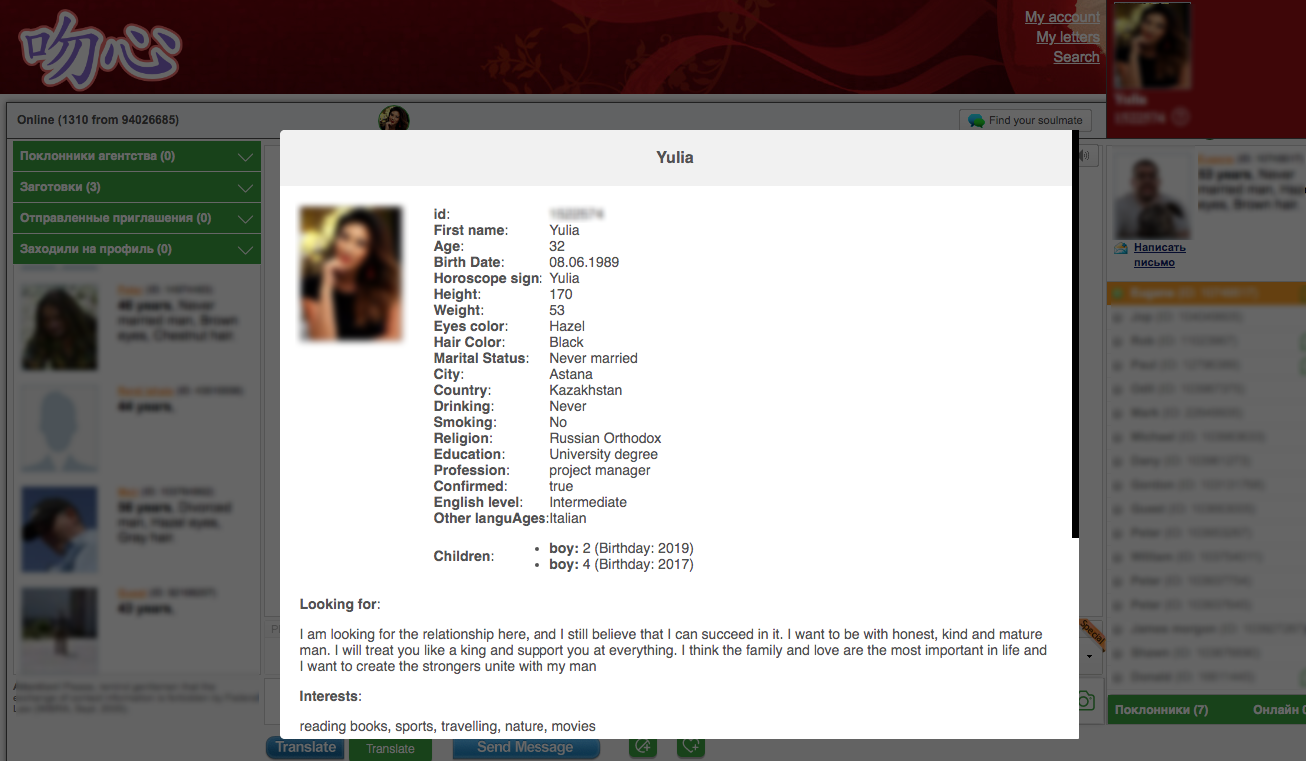
➫⠀⠀Information from the lady’s profile – regardless of the number of profiles you help, the data from the profile on the site will always remind you of how the profile is presented on the man’s side. Click on the question mark next to the lady in the sending status or on the question mark on the lady’s chat tab

➫⠀⠀ChatOS support chat – For any questions regarding the use of the ChatOS system, the ladies and their translators can contact ChatOS technical support specialists directly from the chat page on Svadba.com. Message us ! ChatOS on-line!
Dear Friends! If you still have questions, message us
We will be happy to help you get started efficiently.
By the way, a nice welcome bonus – the first three days of using the ChatOS extensions are for free.
DOWNLOAD THE EXTENSION FOR CHATS FOR GLOBALCOMPANIONS.COM
The ChatOS team wishes you a productive search and pleasant communication!


