CHATS + MAILS 2in1 – THE “MULTI-ACCOUNT” EXTENSION ON THE DATING.COM, ARABIANDATE.COM, EURODATE.COM, DATEMYAGE.COM, AMALDATE.COM SITE
ChatOS Multi-account is comfortable work in one tab with any number of profiles.
By choosing a profile in “Select a profile”,

for the needed profile, the extension sections will open. It will display information related only to the selected profile.
So, by switching profiles means that you can see the corresponding data about communication, gallery, lists of chat partners and other information by selected profile.
GET ACQUAINTED WITH THE EXTENSION’S SECTIONS
MAIN
There is the section where you set up and launch sending processes in chats or mails on the selected profile
How to set up sending in chats read instructions here
How to set up sending in mails read instructions here
BLACK LIST
Аdd men, you do not want to communicate with. Specify the interlocutor’s ID, Name and brief information about him.
Select the option “Personal” (the profile will be in your personal blacklist)
If you also want to block this interlocutor on the site, when adding a profile to the Black List, check the box next to the option with the same name. Save the changes
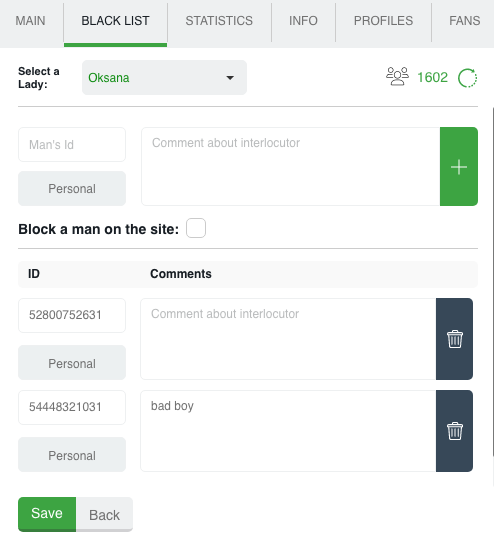
Global blacklist – list of unwanted site’s users for communication for the profilesof your entire agency inside your personal account How to add users to the Global Blacklist – here
STATISTICS
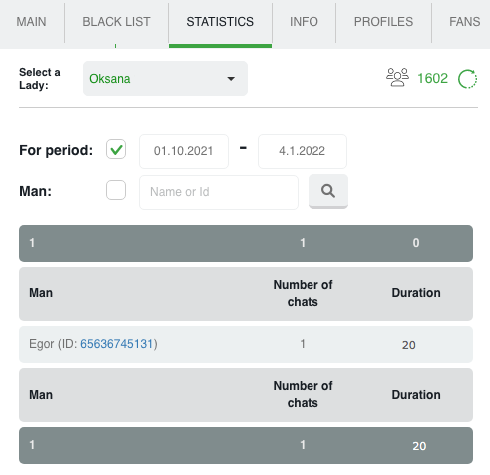
This is the place where information about your communication is stored. How many, when, with whom, how long communication was. Search filters will help you to find the information you need quickly.
INFO
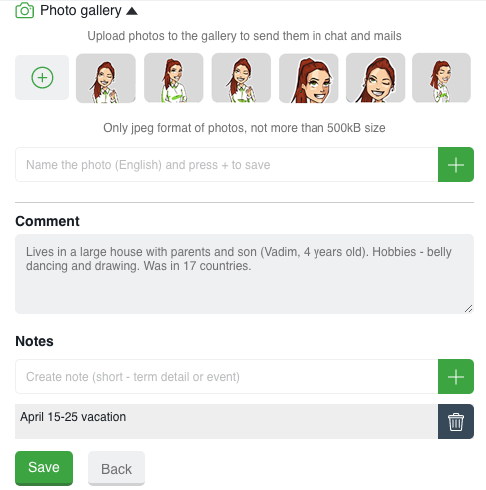
There is a section with complete information about the profile. There is a photo gallery, comments about the profile and small notes that are important to remember. Upload any number of photos, add everything you need to know about the profile.
PROFILES
There is a list of your profiles.
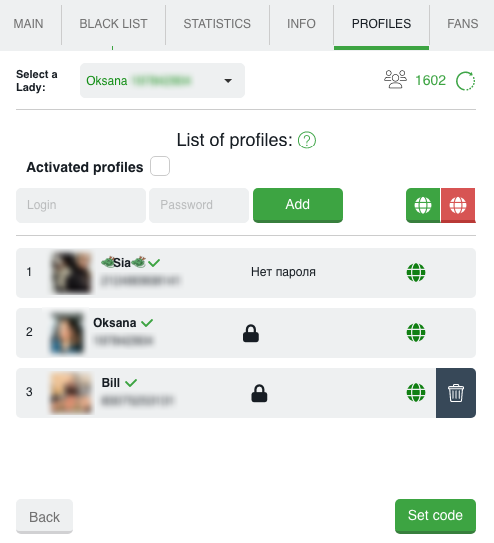
Using the “Add profile” button, by entering username and password, you can replenish your list of profiles. After successful entry, a lady / guy with an avatar and name as they are presented on the site will appear in the list.

If you need to delete a profile, use the “Trash” icon and confirm your desire to remove the profile from the list.

You will quickly find the required profile by starting to enter the data for the required one in the appropriate field.
You can set the online or offline status for a specific or all profiles by clicking on the globe. Globe symbols: green – online profile, red – offline profile, gray – the profile has not launched the extension today.
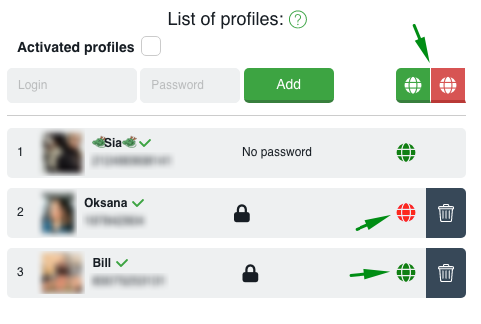
Set code / Unlock. These functions are used to hide passwords of profiles. When adding profiles, the system will offer you to set a security code (set it or not is up to you).

The code can be any five-digit number that you will remember and enter if you need to open and view the passwords of the profiles in the extension.
FANS
There is a list of your most promising and valuable interlocutors. In the fans section you can find all information about your regular chat companions.
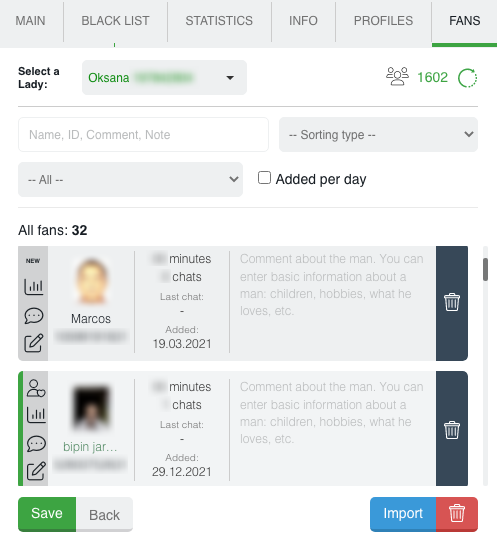
– How to add a profile to fans:Using the Import button, specifying the IDs of the profiles and performing the import
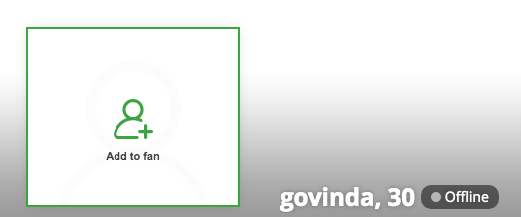
– To add one profile to the fans, you can hover over and click on its avatar and confirm the action
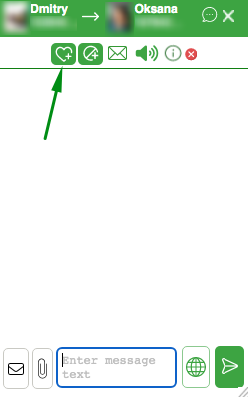
– also quick addition can be done in the Smart Mini Chat window with this interlocutor
HISTORY
There is an archive of your sent invitations to chat (if the extension for chats is open) or mails (if the extension for mails is open) Here you can see the text of the invitation or letter, how many times they were sent, the number of responses, the date of the last sending, easily track the rating, quickly find the words you need using filters, delete unnecessary invitations or mails, watch activity graph…

History in chats
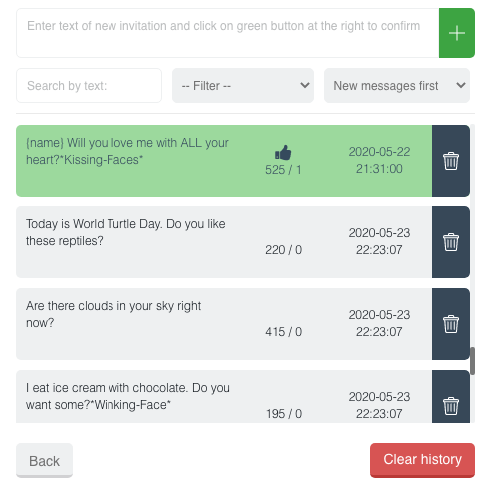
You can add messages manually for future sending. Enter text in the create field and save. If you need to add several messages, add them via Enter. This way you can quickly update the invitations database.
To re-send a message from history just click on it, and the message will be sent to the “message text” field on the main page of the extension for sending.
History in mails
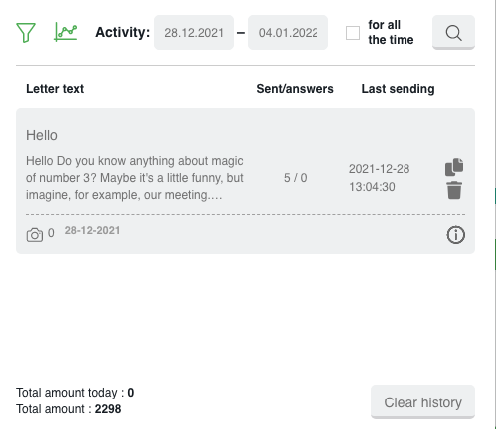
Here you can see the sent mails, the number of sending / replies.
The ability to view statistics by periods, schedules, search for the desired letters by text or apply different filters to study the effectiveness.

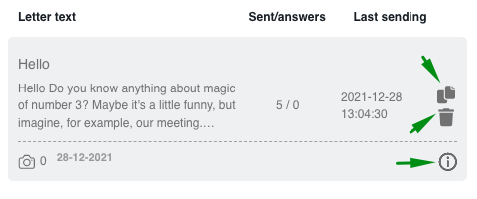
You can also resend the letter, delete the irrelevant one or view the full text by clicking the “info” icon
LET’S MINGLE
There is a section for activating the site’s sending instrument for finding new interlocutors.
This section will help you fully automate the process of new acquaintances. Unlike manually launching Let’s mingle on the site, the extension settings will help you:
– Firstly, keep active Let’s mingle constantly;
– secondly, you can create and send any number of different invitations for each mood. Select the necessary checkboxes, and they will be sent out to men at random in accordance with their statuses on the site.
So, the constantly launched Let’s mingle with different texts will attract more attention and interest in profiles.
Set up invitations for each mood section and check the boxes to send invitations in the sections.
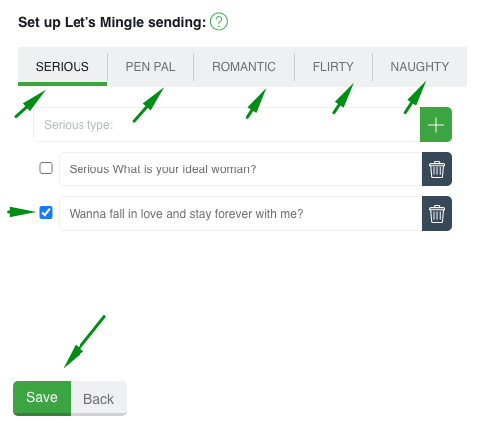
Check the box next to “Launch and keep active ….” on the main page of the extension and click “Save”

Ready! Let’s mingle sending is activated for the profile
By choosing the next profiles, you can set up and launch Let’s mingle for everyone.
Moreover, the next time the extension is launched with an active checkbox, the Let’s mingle sending will start automatically. Just update the invitations periodically for the best interest in the profiles.
Technical support specialists are in touch here. Please message, if you have any questions.
Have productive online!


